Choosing the right slide for your experiment, research, classroom or laboratory testing should not have to be a difficult task. However, with hundreds of options it can become a challenge. Thankfully, we have put together this guide for choosing the right type of slide for your project or laboratory. First, let’s take a look at the history of slides.
Slides date back to the Victorian England era of the early 1800s. The first know slides were simply pieces of bone, ivory or even wood. The specimens were mounted on top of the bone or ivory for observation. Later, the slides were placed on two pieces of mica to better transmit light. In the late 1800s, the first glass microscope slide was introduced.
Different Kinds of Slides

Glass Slides
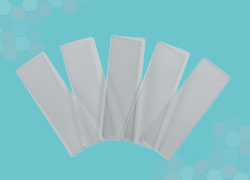
Glass slides are perfect for the practical scientist. Typically coming in the size of 3 x 1 inch or 3 x 2 inches, these slides can be used across a plethora of applications. Typically, plain slides are difficult to write on. Over the years, there have been several new innovations to improve the quality of each plain slide. You can find those outlined in the next section.

Prepared Slides
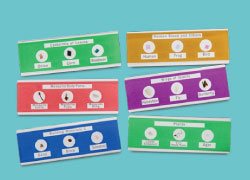
Prepared slides are typically used by the junior scientist or in learning environments. Prepared slides have a premade specimen sandwiched between two glass or plastic slides so the user can reference a specific specimen that may be hard to obtain or difficult to place on a regular plastic slide.
Different Slide Features
Charged Slides
A charged slide refers to the manufacturer adding a chemical (or charge) to the slide. This allows for specific types of tissue to better stick to the slide. Charged slides are typically used for only a specific type of application.
Single or Double Frosted Slides
Frosted slides are best used in research or learning environments. The frosted tip of the slides allows the user to easily identify the specimen by writing directly on the slide.
Colored Edges
Colored edges weren’t created just to bring color to a lab, but for a much more practical reason. Colored edges help a user easily identify, label or color code their specimens.
Slide Edges & Corners
Having beveled or chipped corners have many benefits to the user and are typically chosen based on preference.
- The slides can be easily picked up and handled
- It is believed a rounded edge makes it easier to make a quality liquid smear.
There are several different types of corner options:
- 90-degree corners – this just means that the corners are pointed. 90-degree slides are considered out of date and are typically not used in lab settings anymore.
- 45-degree corners – these slides are the most requested. The 45-degree angle allows for better handling. In fact, 45-degree slides are typically required for automated machines.
- Clipped or nicked corners – these are a cross between the 90-degree and 45-degree slide. The nickeled corner makes it more comfortable to hold but not having a precise angle can be proven as an issue in most labs.
What Slides are Best for Mounting?
The answer to this question is easy: any hydrophilic plain slide. Hydrophilic means to attract water, where hydrophobic means to repel water. Typically, a user wants the liquid to lay flat on a slide. The flatter the specimen, the fewer layers of cells or liquid, which projects a better image under a microscope.
The exception to this rule is when using charged slides. Some applications under-go harsh techniques in the process of staining/fixing/retrieving solutions and users need the specimens to stick.
How are Slides Sold?
Slides are sold per gross. This typically means there are 144 slides (12 dozen) per box.

